Friday, 16 February 2018

How To Paint WW2 Polish Airborne Paratroopers

Polish Airborne Painting Guide

Warlord Games recently released their WW2 plastic multi-part British/Polish Airborne Miniatures in 28mm.  The box set gives you the option to create either British Airborne, Polish Airborne or both.  These miniatures are ideal for their excellent Bolt Action supplement Campaign Market Garden.

This guide uses simple techniques for maximum effect.  This guide can also be adapted to paint British Airborne as the modeled uniform is essentially the same with the exception of the beret.

Vallejo products are majority used however you can look up conversion charts to suppliment what paint range you have.  It does not matter if you are a shade or two off.

I break this guide up into the following steps:

1. Preparation
2. Base Coating
3. Quickshade
4. Highlighting
5. Painting the Face and Flesh
6. Advanced Highlighting
7. Finishing touches
8. Varnishing and Basing

Step 1 - Preparation

There are many guides available on how to prepare multi-part plastic miniatures for painting.  I simply, clip, glue, remove flash lines, then attach to the base  I add some sand and small stones for a nice ground effect.  I use Vallejo Black Surface Primer to Prime the miniatures.  I like to give the primer a good 12 or so hours to dry for maximum adhesion.  You can use an airbrush or brush to prime the miniatures.

Polish Airborne Painting Tutorial
Vallejo 74.602 Black Surface Primer

Step 2 - Base Coating

Base coating is the longest process I have found in painting miniatures.  It is also the most easiest as you can easily fix mistakes.  This process is also known as "blocking in" meaning we get all the colours for the miniature down before we apply washes and highlights.  The miniatures look pretty dull and bland during this step of the painting, don't worry if they look dull... they will look better as we proceed.

Smock - Vallejo 70.882 Middlestone

Webbing/Pouches/Rifle Straps/Gators - Vallejo 70.988 Khaki

Airborne Paratrooper Painting
Skin - AK Interactive 3012 Light Skin

Trousers/Mug/Water Bottle - Vallejo 70.921 English Uniform

Helmet/Helmet Straps/Gas Canister/Water Bottle frame - Vallejo 70.924 Russian Uniform WW2
After Russian Uniform WW2 is applied I pick out the camo on the helmet with some Khaki.

How to paint Paratrooper
Beret - Vallejo 70.816 Luftwaffe Uniform WW2

Rifle Wood/Equipment Handles/Denison Smock Patch - Vallejo 70.984 Flat Brown

Denison Smock Patch - Vallejo 70.979 German Cam Dark Green

Toggle Rope - Vallejo 70.819 Iraqi Sand
With all the colours blocked in I proceeded to paint the base.  I used the left over Flat Brown to cover the entire base.  I used some Vallejo 70.867 Dark Blue Grey to paint the stones.  I paint the rim of the base with Vallejo 70.873 US Field Drab.

WW2 Painting Tutorial Polish Airborne
The blocked in miniatures.  Rather bland looking.

Step 3 - Quickshade

After blocking in, give the paint a good hour or more to cure.  Once this is done we use The Army Painter Quickshade.  I use Strong Tone.  I can't recommend this stuff enough.  It protects the miniature with a hard coat of glossy varnish whilst shading the figure.

I use a brush to apply it.  Use an old thick brush.  I am most generous when I apply it.  I let it sit on the miniature for about a minute or two and then I dab off the pooling areas with a the same brush.

Alternately you can use the Army Painter Strong Tone ink or a similar product by another manufacturer.

Painting Tutorial Polish Airborne
The Army Painter - Quickshade Strong Tone

You can see in the above photo the miniatures are very glossy.  This glossiness is not ideal to move onto our next step.  Please allow a minimum of 48 hours for the quickshade to cure! I wait 3 days.

Once the quickshade is cured, I use a Matt Varnish to dull out the gloss and give a better surface for highlighting.

Painting Guide Polish Airborne
Use Matt Varnish once the quickshade is dry - Vallejo 26.518 
Step 4 - Highlighting

Now the fun begins.  What I do here is reuse all the same colours I used to block in with a couple of exceptions.  I use different colours for the Denison Smock Patches which I will show below. I do not bother highlighting anything black - eg the boots as the quickshade gives them a nice worn effect.

The trick to highlighting is to really thin your paints to that nice milky consistency and just apply small translucent layers until you achieve the look you want.

Once we have highlighted what we have blocked in, we can move on.

WW2 Polish Airborne Painting Guide
Denison Smock Patches - Vallejo 70.826 German Cam Brown and 70.894 Cam Olive Green

How to paint Polish Airborne
Beret - Vallejo 70.964 Field Blue
Step 5 - Painting The Face and Flesh

Painting a 28mm miniature's face is easy to learn but difficult to master.  The way I approach it is as follows:

1. Block the eyes in with a thick black line
2. Draw a white line slightly smaller over this black line with white or ivory
3. Draw a small line downwards through the centre of the eye with black.
4. Use a dark flesh colour to reduce the area of the black around the eyes.
5. Highlight the skin (there are lots of good guides out there on how to do this)
6. I use a deep red for the lips.

Practice Makes Perfect!  Skip the eyes if you want.

How to paint miniature eyes faces
Don't worry about the Panda Eye Effect initially

how to paint miniature skin
Reduce the Panda Eye Effect and Highlight the Skin

miniature skin flesh tutorial
Flesh Tones - AK Interactive 3011 Base Flesh, 3012 Light Flesh, 3013 Highlight Flesh, 3014 Shadow Flesh (for lips)

Step 6 - Advanced Highlighting

Here we take it to the next level.  You can skip this step if you like however it does not take long.  What we want to do here is thin our paint even more and introduce a lighter shade to the colours we used in Step 4.  I use Vallejo 70.918 Ivory to do this.  You could use a similar shade, I find it is much better than plain white.  

We want to highlight the trousers, and khaki predominantly.  I didnt bother with the Denison Smock at this stage as it may look "too busy" at this scale. However saying this a slight highlight of Khaki on the Denison Smock looks very nice. We take the wooden components up another highlight.

how to paint British Airborne
Pick out small details with Ivory mixed into our highlight colours

British Airborne Painting Guide
Rifle Wood Grain, Wooden Handles - Vallejo 70.981 Orange Brown
Step 7 - Finishing Touches

Black lining is an advanced technique that really makes things pop.  To black line I thin black paint and use a very fine brush.  I draw a slight edge or line underneath or around an object.  I like to black line where the uniform meets another part of the model - eg hands, pants etc and the khaki straps.  I also black line the bottom of the toggle rope and black off the metal parts of the rifle.

On the Sub Machine gun pouches I like to add little buttons.  First I do a small blob of black topped with an even smaller blob of ivory or white.  I slightly black line the spaces in between the pouches.

Black Lining and weapons - Vallejo 70.950 Black - note the ammo pouch buttons

After this I then go over the rim of the base with US Field Drab to make it look nice and clean.

Polish British Airborne Tutorial Guide
Base Rim - Vallejo 70.873 US Field Drab
The last thing we want to paint is metallic highlights on metal surfaces, the beret badge and weapons.  Two key points here.  Firstly, less is more and secondly use this paint last as it will contaminate your brush and water with metallic flakes. To do the beret badge I first paint it black then pick out the detail with Gunmetal.

Paints for British Airborne Polish Airborne
Less is more! Beret Badge, Metal bits, Weapon Highlights - Vallejo 70.863 Gunmetal

Step 8 - Varnishing and Basing

I use a rather different way when it comes to this.  The first thing I do is spray or brush on a thin coat of Gloss Varnish over everything.  Gloss Varnish is super tough and will protect all those nice highlights.

Once this is dry, usually after about 2 hours I will add basing material.  This can be whatever theme you are going for.  I used white flowers with some flock and some clump foliage I made.

Once this is dry I then spray or brush on a Matt Varnish to get rid of the gloss varnish and to seal the basing materials in...

... and finally I use AK Interactive Ultimate Matte Varnish.  This product is exceptionally good and will give you a very flat and smooth finish.  The miniatures look and feel lovely!

How to paint WW2 British Paratroopers
Gloss Varnish Vallejo 26.517, basing materials, Matt Varnish Vallejo 26.518 then finish with AK 183 

British Paratrooper Guide
The finished Product

Polish Paratroopers 
How to paint WW2 Polish British Paratroopers
So there you have it! Some great looking miniatures in 8 simple steps.  I found this is the most efficient way of painting miniatures for the table top that really stand out from the rest.  With practice you can get to a standard you are happy with.  Don't be disheartened if you are not entirely satisfied with what you produce.  Just remember that it is one less figure to paint and it certainly beats an unpainted figure!

Thanks for taking the time to read this guide.  Hopefully you will have a Paratrooper force painted up in no time! Any questions you can reach me here on on twitter.

Polish Paratrooper WW2
28mm Polish Airborne by Warlord Games


Thursday, 15 February 2018

Project Waterloo - Update #1

Incoming! It has arrived! The Farmhouse Assault - La Haye Sainte Collectors Edition!


Warlord Games have absolutely blown my mind with just how awesome this box set is.  The box alone is a thing of beauty and the miniatures are just superb.  The photos of them on their website look good but up close I think they look great!

For those that follow me on Twitter you will recall seeing this photo:


You may notice that this cost me a cool £310 but... you may also notice I got 6 Black Powder box sets for free! I had a voucher that for every £50 I spent I got a Black Powder Box for free.  So there you go, what an incredible deal! Even better this deal still took effect when I took advantage of the recent Warlord Games Sprue sale.  I got a 7th box for free! So when that order arrives I will have another box of Polish Vistula Legion (obviously not for Project Waterloo).

Warlord even timed the order for me as I was to be out of town and as it was coming by Courier they sent it on a day I requested.  Absolutely fantastic customer service and the order was sent Monday Night Australian Eastern Standard Time and arrived Thursday Morning Australian Eastern Standard time. Most impressed!

I was so excited to open the box, I had flashbacks to Christmas as a kid!

I even put the Sharpe's closing credits song on full blast to capture the moment, it was most majestic and tear jerking. 


Well done Warlord Games for using Paper Packaging fillers as opposed to plastic!

This was a great moment and immensely satisfying
A beautiful boxset and the large white box is the Collectors Edition contents
Oh boy... 6 free boxes of goodness!
So excited to get cracking on this stuff! To be fair its probably going to take me years to paint.  Also you may have noticed my miniatures table on the top right of the blog has completely blown out for the month of February!  The Zombicide Green Horde Kickstarter Wave 1 certainly didnt help and this order bought 270 odd miniatures to the party!!!! Wow!

Up next... my 28mm WW2 Polish Airborne Painting Guide.

Arthur is most unimpressed with the mass of unpainted miniatures


Tuesday, 13 February 2018

Warlord Games 28mm Polish Vistula Legion Review

One of my first interests in Napoleonics had to be the Polish Vistula Legion for obvious reasons.  I knew nothing about the unit when I first dipped my toe in this fascinating era.  To be fair, I still don't know that much.  I could only find limiting and conflicting information on the internet.

I was not going to let trivial little historical inaccuracies etc stop me from painting up these figures.  I was most surprised and pleased at just how well the Warlord Games Polish Vistula Legion Painted up.

28mm Polish Vistula Legion Miniatures Figures
The miniatures are the Warlord Games French infantry with metal Vistula Legion heads.  Warlord Games state they have put a lot of research into the unit so I take their word for it as they are generally pretty damn good when it comes to this sort of thing.

In the box you get 5 x  Plastic French Sprues and a variety of metal heads.  You get 4 x Command figures cast in metal.  It does not come with instructions and a complete Napoleonics newby like me had to work out what a Fusilier, Voltigeur and a Grenadier was and what head to give them.  A bit of research online and I figured out what is on the sprue.  I have captioned the images below with what parts in the box set are for Fusiliers, Voltigeurs and Grenadiers.  

Soldiers Left to Right - Voltigeur/Grenadier, 3 x Fusiliers

Backpacks Left to Right - Fusilier, Fusilier, Voltigeur, Grenadier, Fusilier

Heads from top to bottom - Drummer & Officer, Grenadiers in Czapkas, Voltigeurs/Grenadiers, Fusiliers
 Now with that sorted I put them together.  I decided to put Czapkas on my Grenadiers because they are cool and unique.  You only get 20 plastic soldiers in the box set so I have an additional box set incoming for free with a deal from Warlord and took advantage of their recent sprue sale to bulk up my unit.  I will be assembling some ranked up Voltigeurs.

These chaps paint up lovely. I first thought the marching pose was kind of boring however they look great ranked up and you can easily pick out the details.  The plastic is cast well and needs minimal clean up.  You only need to glue the head and backpack on so assembly is fast and easy.

I would highly recommend these figures and are great value.

28mm Polish Vistula Legion Command
Polish Vistula Legion Command - Sapper, Colonel, Officer, Drummer

Polish Vistula Legion Grenadiers Czapka
Polish Vistula Legion Grenadiers wearing Czapkas

28mm Polish Vistula Legion
Polish Vistula Legion Fusiliers in Shakos

Polish Vistula Legion Fusiliers Shako 28mm

The first 20 painted

28mm Polish Vistula Legion Drummer
Polish Vistula Legion Drummer

Polish Vistula Legion Drummer

Polish Vistula Legion Drummer Uniform
A quick final note.  In the latest Analogue Hobbies Painting Challenge my drummer ended up making one of the top entries for the themed round of Musician.  

Polish Vistula Legion - So much swagger

Saturday, 10 February 2018

Adding to the Warband... Frostgrave

I finished these two lads a couple of weeks ago however have had no time to post due to work.  Now that things have settled, I present my next two chaps for my Frostgrave Warband.

28mm frostgrave cultists
Range Support for My Frostgrave Warband

An Archer and a Crossbow Man

Frostgrave Cultist Miniatures
Frostgrave Cultists
The theme of bright colours has proven popular and I only need a few more options to do for my Warband. 


Sunday, 28 January 2018

2018 - What a year it is going to be!

I have left my 2018 post to the last days of January.  Most people usually do this in the early days of 2018, not me!

So first things first it has been a very busy start to 2018 for me both work wise and hobby wise.  I am in the Analogue Hobbies Annual Painting challenge and I am well behind my target of 750 Points.  You can see my progress here.

As previously published my 2017 wrap up is here and it didn't go as planned as I initially thought but 2017 was a huge success as a whole. 

Hobby Goals for 2018 in no order of priority

  • Project Waterloo
  • 28mm Napoloenics in other Campaigns
  • Expanding on all my current WW2 Armies in 28mm
  • Expanding my neglected WW2 Project in 20mm
  • Painting more boardgame minis
  • Reduce my horde of figures
  • Terrain terrain terrain! Something I need more of
  • paint more minis, paint lots of minis, paint more minis

Now to help me achieve the above, you can probably see a table to the top right of my Blog.  Its simple.  Miniatures received and miniatures painted.  By receive I refer to purchased and freebies as I have been receiving a few of those lately.  Now 2018 is already off to a disastrous start in terms of a received/painted ratio and it is only going to get worse! I have hundreds of 28mm Napoleonics incoming among two kickstarters, Zombicide Green Horde and A Song of Fire and Ice.  I have to get on top of this addiction and this could be the kicker I need.  That little table will be my constant reminder.  I think I am going to cut way back on my purchases now as for the first time I have more figures not painted than painted! 

28mm Warlord Games Fallschirmjager
Pretty much the look on my face when I saw that table

Social Media Goals


  • Get more of my stuff featured on other websites
  • Expand my twitter presence
  • Gain more followers on Blogger
  • Get 150 posts up on Blogger
If you don't follow me on twitter you should as I post a lot more stuff there and stuff that doesn't make it to here.  I recently gained 100+ followers, hopefully 200 followers soon! You may have also noticed some minor changes to the layout of LHP.  

Gaming Goals

  • Play More Games! Aim for an average of one a week
  • More solo play
  • Play my awesome neglected boardgames
I have pretty much ceased playing in Tournaments, I much prefer the social side of gaming, not the competitive side.  It has now been a year since my last tournament and no regrets!

Conslusion

Really as hobbyists can we really stick to our goals? Me... not really.  The main thing is having fun and documenting my journey which my first post ever was all about.  Lol what a bizarre and unexciting post!  

Thanks to all of you that follow me and here's to a great 2018!

-Dave.

My Waterloo - Picking the scale and doing it in 28mm

Undoubtedly one of the most popular eras for War Gaming is The Battle of Waterloo.  It was one of the most famous battles of all time and even non gamer types have heard of it.  Even here in Australia we have pubs, streets and even suburbs named after the famous battle... so I'm doing it!


Some Complementary Music if you are so brave...


Scale

Well wasn't this a contention for debate for myself!  It came down to two choices although I did explore more!  18mm by AB Figures and Campaign Game Miniatures or 28mm with a huge choice of figures.  For once I think I can say 28mm is the winner for scale when it comes to Napoleonic gaming (danger zone for saying that, ducks for cover!) and in particular Waterloo thanks to the Perry Miniatures range, Victrix and Warlord Games, obviously there are a lot more however this choice is always up for debate!
18mm AB Figures - Lovely

18mm CGM KGL/British Infantry Retrieved from their Website

Now these chaps look all well and good but... they are so small and I love details in my figures which these chaps have.  I really wanted the mass look and to save space so this really put me at a cross roads as I wanted them however I know some guys in my gaming group that do Waterloo and Napoleonics in general in 28mm! Essentially no one I know has Napoleonics in 18mm/15mm let alone Waterloo.

As previously mentioned there are some great ranges in 28mm and I am a massive fan of Perry and Warlord so the decision was made for me and now I am going to commit to it, 28mm it is.

Luckily Warlord Games sent me an awesome deal for every 50 quid I spent I get a free Black Powder box set.  As I had been eyeing off La Haye Sainte Collectors edition, well this happened!!!

Lots and lots and lots and lots... of figures! Tremendous value!

Wow! That is going to keep me busy.  A whole play set and 6 yes 6 boxes for free! :)  I have heard mixed reviews about Victrix figures however some of the poses and interchangeability with the Perry Plastics was to good to pass up on so I got a horde of them incoming and you can't beat Victrix for value. I do like some variety on the table and I have really warmed to the Warlord Figures too.  After assembling some of the Polish Vistula Legion they go together quickly and are simple to paint and I expect this too with their British Line Infantry.

I want to represent Hougoumont and La Haye Sainte on the table.  I have upgraded the gaming facilities at LHP HQ to an 8 x 6 table with the approval of Mrs LHP.  I will not be playing the entire battle obviously, just lots of the engagements that happened on the day.  I am not too fused about capturing every single little detail etc etc and dont want long dragged out games that take whole days to complete so I figured minor engagements in 28mm is the best way for me to set out what I want to achieve.

Rules

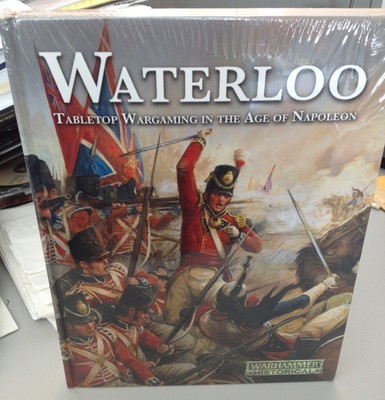
I really want to play Warhammer Historical Waterloo after recently aquiring the book and reading it cover to cover.  My good friend and rival Murray also just picked this up! -  not to mention he also go the La Haye Sainte Collectors set :) 


I will not be limiting myself to this set of rules, I'm keen to try Blackpowder and some Sharp Practice 2.  I wouldn't even mind getting some solo play in at some stage.

Test Figure

As mentioned I want to play out some Hougoumont.  The Coldstream Guards were there and so I thought I would be different and paint one of them up first.  My Perry's will be representing these chaps as the defence of Hougoumont really suits their poses.  Again another decision for 28mm is they just look so damn good.  

28mm Perry Miniatures British Line Infantry
28mm British Line Infantry - Perry Miniatures

28mm Coldstream Guards Waterloo
Coldstream Guards - Battle of Waterloo

28mm British Line Infantry Waterloo


This is going to be a project that is going to take years! Yes years! I can do it at my own pace and slowly add to it... and yes I will be painting some French (I thought I would never say that).

Stay tuned...

Arthur would most certainly challenge me to a duel if he saw this