Showing posts with label Warlord Games. Show all posts

Monday, 22 July 2024

Bolt Action... The game we love and hate

 I have been playing Bolt Action for almost 10 years now and a lot has changed since I first picked up the rules.  I started playing towards the end of 1st edition and generally played the Bolt Action . (dot) net modified rules - I believe these are what they were called at the time.  I went in head first and collected and painted a number of Armies however this has slowed down over the years.  I have thoroughly enjoyed 2nd edition however it feels bloated and slightly stale and I am really looking forward to the much anticipated 3rd edition.  

Bolt Action Tank War
A Stug famously destroys one of my mate Joe's American Half Tracks.  We had an epic game of Bolt Action Tank War many years ago.

I have been fairly critical of Bolt Action in the past but one thing I noticed as it gained more and more popularity is the small but vocal minority that criticise the game.  My criticisms are minor compared to my praise for the game and its obvious by my Social Media Networks that I thoroughly enjoy the game as a casual player and have had some success in the competitive scene.  I far prefer casual and historic match ups over competitive gameplay however I do enjoy the social aspect that attending an event provides.  

Bolt Action Cancon
I am not the biggest fan of Competitive tabletop gaming but I can hold my own and have has many successes over the years.

Most criticisms I see for Bolt Action are on the Bolt Action Facebook group or other historical Facebook groups for WW2 Games that are not Bolt Action.  The Bolt Action Facebook group is a mixed bag and at one stage I left the group due to mixed reasons but I re-joined a couple of years ago as the page became overwhelmingly more positive and better moderated.  It still has the odd know it all, or just plain rude person bringing someone down for what they posted but that is to be expected now that the page has over 26,000 members. 

Bolt Action Warbird Rules
The Experimental Warbird Rules are always fun.

26,0000 members is a lot! Take aways the bots, the multiple accounts, the lurkers and the people that no longer play the game you are still looking at a very large player base for what is undeniably the most popular WW2 tabletop miniatures wargame.  If you look at all the other WW2 tabletop miniature wargames Facebook groups and combine their memberships you wouldn't even get half of the following that Bolt Action has.  Facebook however is a guide only and I appreciate there are other Social Media Platforms that have large followings of other rulesets such as Chain of Command on the Social Media Platform Twitter.

Bolt Action Large Game
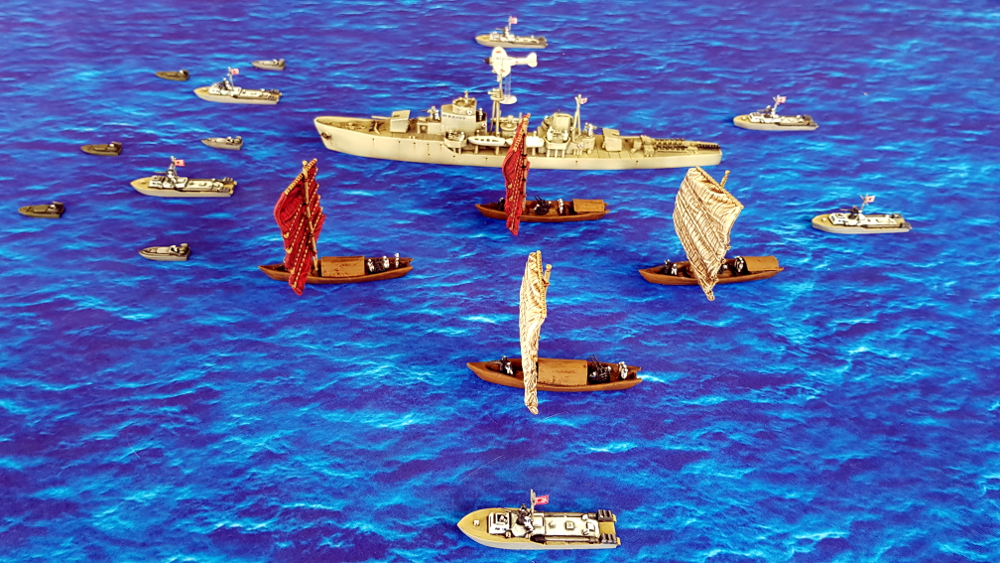
Large Thematic Group Games of Bolt Action are always Fun.  My Favourite way to play the game.

The negative attitudes to Bolt Action are often humorous and harmless however I have a laugh to myself whenever I see someone ranting about how it is the Hollywood version of WW2 or it is just a re-skin of Warhammer 40k.  The game can be broken by the competitive sweatys, but after all its a game and a game that has a large player base, so this is bound to happen.  

Bolt Action Early War
Early War is my favourite era for Bolt Action - A very level playing field

Say what you want about the game and its historical errors, it is the juggernaut of WW2 Wargames Rules and whether you agree or disagree it is a fantastic introduction to WW2 on the Tabletop.   Some of Warlord Games' sculpts are questionable and the grumblings of button counters are heard, however they have the largest range of 28mm WW2 Miniatures and their sculpts are continuing to improve.  I see Bolt Action through my own experiences as a Gateway Game for historical Wargaming.  If it wasn't for Bolt Action, I wouldn't of played and collected a large number of forces over a number of historical periods.  I would not have discovered the Too Fat Lardies world of wargames or brands such as Perry Miniatures if it wasn't for this game.  I would still be stuck in the Games Workshop ecosystem.  

Perry Miniatures Offensive Miniatures DAK
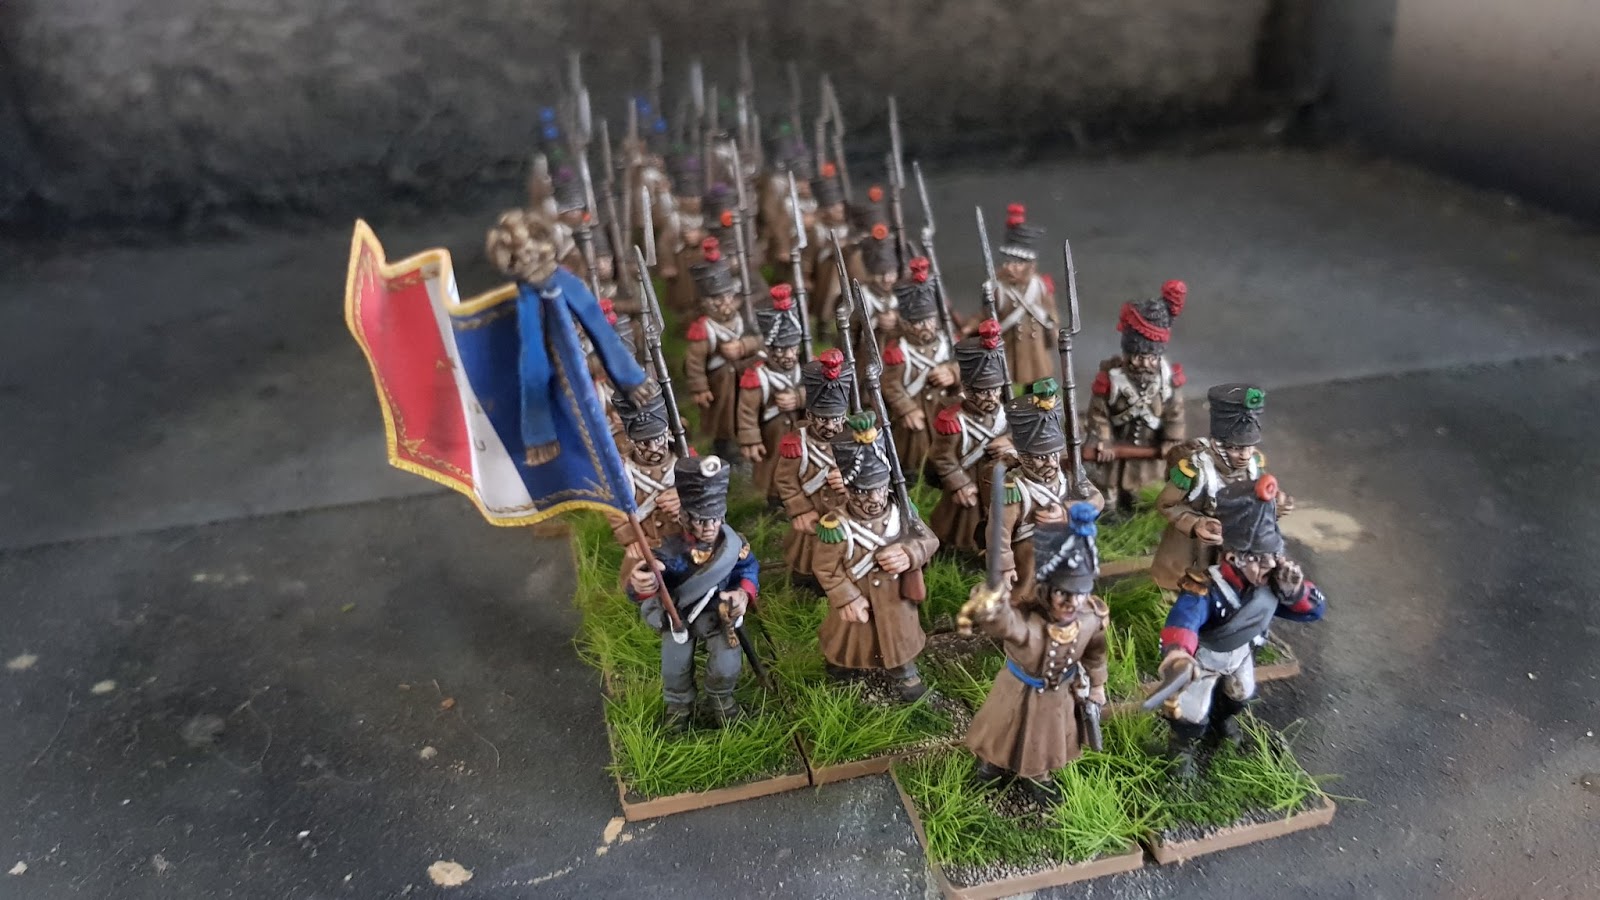
Perry Miniatures and Offensive Miniatures DAK are a match made in Heaven

Bolt Action will continue to grow, especially with the hype for the upcoming 3rd Edition of the game. From what I can see so far, its the shakedown the game needed to refresh its rules and reinvigorate the player base.  The sweatys will no doubt break the game and you will get the win at all cost types bending the truths of history for glory on the tabletop.  I however look forward to playing lots of themed games with my mates and most of all having fun.  

Keep painting those Fallschirmjager Helmets Blue, for every time you do, a button counter will criticise another Warlord Games Sprue.  


Warlord Games Winter Fallschirmjager
My version of Winter Fallschirmjager for the Ardennes 


Wednesday, 31 July 2019

Project Waterloo Update - La Haye Sainte

I am striving to get the Warlord Games La Haye Sainte Collector's edition fully completed by mid-September.  I will be featuring this large collection of 170+ miniatures in a soon to be announced book.

If you have been following me on Twitter you will see the progress I have been making.  I have painted 127 of the miniatures so far and there is light at the end of the tunnel.  I am slowly constructing the farmhouse itself.  I really can not wait to finish this project.  It is going to look epic and will be a great achievement.

So far I have painted:

36 x French Light Infantry
36 x Hanoverian Line Infantry
36 x French Infantry
6 x Luneburg Light Infantry
5 x King's German Legion Infantry
5 x French Engineers
1 x Lieutenant Vieux
1 x Farmer's Wife
1 x Marshall Ney
1 x Nassau Officer Extinguishing Fire
Resin Sandpit

 All the plastic figures are done, the three line battalions have taken the most time, its now just doing all the little blister packs of metal troops and the terrain!


French Light Infantry back when they were WIP
French Line Infantry


Hannoverian line Infantry

Kings German Legion

Luneburg Riflemen, my favorite so far.


Tuesday, 19 February 2019

Cruel Seas Japanese Fleet

Cruel Seas seems to be very popular at the moment.  Despite a shaky start with a rulebook that was rushed and required a reprint the game seems to be doing well.  I of course jumped on the bandwagon however I have yet to pick up the rules.

I decided to go with a Pacific theme first and went with Japanese.  The Japanese Fleet is certainly different and unique to the other options available, most notably the suicide Kamikaze vessels and the Sampans.

All the models are 1/300 which is a rather large scale for Naval Warfare however as the game is focused around MTB and small fleet engagements it should not be too crowded on a 6 x 4 table.

The mat photographed is from Fatmat in Australia and as you can see it is very blue but perfect for the pacific.

My Fleet is painted up and ready to play! Let's hope my dice roll honorably.

Cruel Seas Japanese Fleet
Cruel Seas by Warlord Games Japanese Fleet

Cruel Seas Warlord Games Japanese

Japanese Cruel Seas

Japanese Sampans
Japanese Sampans

Sampan WW2

T14 MTB T-14 Motor Torpedo Boat Japanese MTB
Japanese T-14 Motor Torpedo Boats

Maru-Ni Shin'yo Kamikaze suicide boat
Kamikaze Boats - Maru-ni in Grey, Shin'yo in green

Hei-Class Minesweeper
Hei Class Escort Minesweeper

Hei Class Mine Sweeper

Cruel Seas Japanese Ships

1/300 Japanese


D3A IJN
Achi D3A "Val"

Cruel Seas Aircraft

The Hei class is quite a large ship compared to the others


Monday, 12 March 2018

First Squad of Winter Germans Complete

Its been a while since I painted my Winter Test German.  I thought it best I finish off the squad and thanks to the Analogue Hobbies Painting challenge I have done so.  The test figure is hiding in the back of the group photo and I painted up the remaining 9.  This brings my tally of total figures painted for March to 53!

These are the Warlord Games German Grenadier Squad (Winter).  These are fantastic 28mm Metal Miniatures.  I have another box of these to do and will try and make them different to this squad.

I am quite pleased with the result and they have a real winter feel to them.


28mm Winter German Grenadiers
28mm WW2 Winter German Grenadiers by Warlord Games

28mm WW2 Winter Germans
My favorite 3 poses

NCO with MP40, Assault Rifle, Rifle and Panzerfaust (Note... it is not left handed)
Panzerfaust with rifle, MG42 Team.


Friday, 16 February 2018

How To Paint WW2 Polish Airborne Paratroopers

Polish Airborne Painting Guide

Warlord Games recently released their WW2 plastic multi-part British/Polish Airborne Miniatures in 28mm.  The box set gives you the option to create either British Airborne, Polish Airborne or both.  These miniatures are ideal for their excellent Bolt Action supplement Campaign Market Garden.

This guide uses simple techniques for maximum effect.  This guide can also be adapted to paint British Airborne as the modeled uniform is essentially the same with the exception of the beret.

Vallejo products are majority used however you can look up conversion charts to suppliment what paint range you have.  It does not matter if you are a shade or two off.

I break this guide up into the following steps:

1. Preparation
2. Base Coating
3. Quickshade
4. Highlighting
5. Painting the Face and Flesh
6. Advanced Highlighting
7. Finishing touches
8. Varnishing and Basing

Step 1 - Preparation

There are many guides available on how to prepare multi-part plastic miniatures for painting.  I simply, clip, glue, remove flash lines, then attach to the base  I add some sand and small stones for a nice ground effect.  I use Vallejo Black Surface Primer to Prime the miniatures.  I like to give the primer a good 12 or so hours to dry for maximum adhesion.  You can use an airbrush or brush to prime the miniatures.

Polish Airborne Painting Tutorial
Vallejo 74.602 Black Surface Primer

Step 2 - Base Coating

Base coating is the longest process I have found in painting miniatures.  It is also the most easiest as you can easily fix mistakes.  This process is also known as "blocking in" meaning we get all the colours for the miniature down before we apply washes and highlights.  The miniatures look pretty dull and bland during this step of the painting, don't worry if they look dull... they will look better as we proceed.

Smock - Vallejo 70.882 Middlestone

Webbing/Pouches/Rifle Straps/Gators - Vallejo 70.988 Khaki

Airborne Paratrooper Painting
Skin - AK Interactive 3012 Light Skin

Trousers/Mug/Water Bottle - Vallejo 70.921 English Uniform

Helmet/Helmet Straps/Gas Canister/Water Bottle frame - Vallejo 70.924 Russian Uniform WW2
After Russian Uniform WW2 is applied I pick out the camo on the helmet with some Khaki.

How to paint Paratrooper
Beret - Vallejo 70.816 Luftwaffe Uniform WW2

Rifle Wood/Equipment Handles/Denison Smock Patch - Vallejo 70.984 Flat Brown

Denison Smock Patch - Vallejo 70.979 German Cam Dark Green

Toggle Rope - Vallejo 70.819 Iraqi Sand
With all the colours blocked in I proceeded to paint the base.  I used the left over Flat Brown to cover the entire base.  I used some Vallejo 70.867 Dark Blue Grey to paint the stones.  I paint the rim of the base with Vallejo 70.873 US Field Drab.

WW2 Painting Tutorial Polish Airborne
The blocked in miniatures.  Rather bland looking.

Step 3 - Quickshade

After blocking in, give the paint a good hour or more to cure.  Once this is done we use The Army Painter Quickshade.  I use Strong Tone.  I can't recommend this stuff enough.  It protects the miniature with a hard coat of glossy varnish whilst shading the figure.

I use a brush to apply it.  Use an old thick brush.  I am most generous when I apply it.  I let it sit on the miniature for about a minute or two and then I dab off the pooling areas with a the same brush.

Alternately you can use the Army Painter Strong Tone ink or a similar product by another manufacturer.

Painting Tutorial Polish Airborne
The Army Painter - Quickshade Strong Tone

You can see in the above photo the miniatures are very glossy.  This glossiness is not ideal to move onto our next step.  Please allow a minimum of 48 hours for the quickshade to cure! I wait 3 days.

Once the quickshade is cured, I use a Matt Varnish to dull out the gloss and give a better surface for highlighting.

Painting Guide Polish Airborne
Use Matt Varnish once the quickshade is dry - Vallejo 26.518 
Step 4 - Highlighting

Now the fun begins.  What I do here is reuse all the same colours I used to block in with a couple of exceptions.  I use different colours for the Denison Smock Patches which I will show below. I do not bother highlighting anything black - eg the boots as the quickshade gives them a nice worn effect.

The trick to highlighting is to really thin your paints to that nice milky consistency and just apply small translucent layers until you achieve the look you want.

Once we have highlighted what we have blocked in, we can move on.

WW2 Polish Airborne Painting Guide
Denison Smock Patches - Vallejo 70.826 German Cam Brown and 70.894 Cam Olive Green

How to paint Polish Airborne
Beret - Vallejo 70.964 Field Blue
Step 5 - Painting The Face and Flesh

Painting a 28mm miniature's face is easy to learn but difficult to master.  The way I approach it is as follows:

1. Block the eyes in with a thick black line
2. Draw a white line slightly smaller over this black line with white or ivory
3. Draw a small line downwards through the centre of the eye with black.
4. Use a dark flesh colour to reduce the area of the black around the eyes.
5. Highlight the skin (there are lots of good guides out there on how to do this)
6. I use a deep red for the lips.

Practice Makes Perfect!  Skip the eyes if you want.

How to paint miniature eyes faces
Don't worry about the Panda Eye Effect initially

how to paint miniature skin
Reduce the Panda Eye Effect and Highlight the Skin

miniature skin flesh tutorial
Flesh Tones - AK Interactive 3011 Base Flesh, 3012 Light Flesh, 3013 Highlight Flesh, 3014 Shadow Flesh (for lips)

Step 6 - Advanced Highlighting

Here we take it to the next level.  You can skip this step if you like however it does not take long.  What we want to do here is thin our paint even more and introduce a lighter shade to the colours we used in Step 4.  I use Vallejo 70.918 Ivory to do this.  You could use a similar shade, I find it is much better than plain white.  

We want to highlight the trousers, and khaki predominantly.  I didnt bother with the Denison Smock at this stage as it may look "too busy" at this scale. However saying this a slight highlight of Khaki on the Denison Smock looks very nice. We take the wooden components up another highlight.

how to paint British Airborne
Pick out small details with Ivory mixed into our highlight colours

British Airborne Painting Guide
Rifle Wood Grain, Wooden Handles - Vallejo 70.981 Orange Brown
Step 7 - Finishing Touches

Black lining is an advanced technique that really makes things pop.  To black line I thin black paint and use a very fine brush.  I draw a slight edge or line underneath or around an object.  I like to black line where the uniform meets another part of the model - eg hands, pants etc and the khaki straps.  I also black line the bottom of the toggle rope and black off the metal parts of the rifle.

On the Sub Machine gun pouches I like to add little buttons.  First I do a small blob of black topped with an even smaller blob of ivory or white.  I slightly black line the spaces in between the pouches.

Black Lining and weapons - Vallejo 70.950 Black - note the ammo pouch buttons

After this I then go over the rim of the base with US Field Drab to make it look nice and clean.

Polish British Airborne Tutorial Guide
Base Rim - Vallejo 70.873 US Field Drab
The last thing we want to paint is metallic highlights on metal surfaces, the beret badge and weapons.  Two key points here.  Firstly, less is more and secondly use this paint last as it will contaminate your brush and water with metallic flakes. To do the beret badge I first paint it black then pick out the detail with Gunmetal.

Paints for British Airborne Polish Airborne
Less is more! Beret Badge, Metal bits, Weapon Highlights - Vallejo 70.863 Gunmetal

Step 8 - Varnishing and Basing

I use a rather different way when it comes to this.  The first thing I do is spray or brush on a thin coat of Gloss Varnish over everything.  Gloss Varnish is super tough and will protect all those nice highlights.

Once this is dry, usually after about 2 hours I will add basing material.  This can be whatever theme you are going for.  I used white flowers with some flock and some clump foliage I made.

Once this is dry I then spray or brush on a Matt Varnish to get rid of the gloss varnish and to seal the basing materials in...

... and finally I use AK Interactive Ultimate Matte Varnish.  This product is exceptionally good and will give you a very flat and smooth finish.  The miniatures look and feel lovely!

How to paint WW2 British Paratroopers
Gloss Varnish Vallejo 26.517, basing materials, Matt Varnish Vallejo 26.518 then finish with AK 183 

British Paratrooper Guide
The finished Product

Polish Paratroopers 
How to paint WW2 Polish British Paratroopers
So there you have it! Some great looking miniatures in 8 simple steps.  I found this is the most efficient way of painting miniatures for the table top that really stand out from the rest.  With practice you can get to a standard you are happy with.  Don't be disheartened if you are not entirely satisfied with what you produce.  Just remember that it is one less figure to paint and it certainly beats an unpainted figure!

Thanks for taking the time to read this guide.  Hopefully you will have a Paratrooper force painted up in no time! Any questions you can reach me here on on twitter.

Polish Paratrooper WW2
28mm Polish Airborne by Warlord Games