Showing posts with label Tinkercad. Show all posts

Monday, 5 March 2018

Some Terrain for the Table

My terrain building has really slowed down recently and I am getting back into it.  First up I decided to assemble and paint the "Ruined Hamlet" by Warlord Games.  This came in the Band of Brothers starter box set for Bolt Action Version 2.

I based it on some spare plasticard and decided to go with a Winter Theme for my Winter WW2 engagements and for Frostgrave.  Winter terrain looks really unique and gives a great theme to any table.

Based on a couple of old bits of plasticard


Warlord Games ruined Hamlet
Ruined Hamlet by Warlord Games

how to make winter terrain

wargame winter terrain

woodland scenics soft flake snow

Its interesting that this kit from Warlord Games is actually a re-branded 1/72 kit from Italeri.  My formula for snow and winter effects is as follows:

  • Woodland Scenics Flex Paste
  • Wilder Snow Effects
  • GW Valhallen Blizzard
  • Woodland Scenics Soft Snow Flake
  • Various Winter tufts
This gives a very frosted wintery feel and looks lovely on the table :)

Pimping the Ebay Trees

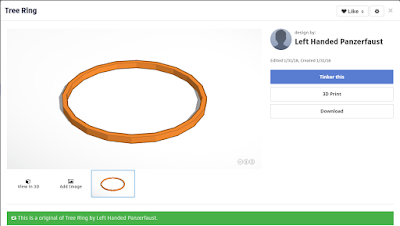
Next up we have a base for my Ebay pimped trees.  The trees look a little bland on the table and now they have a cool base for them.  I used some Plasticard and cut it in an interesting shape then I designed some "rings" to hold them in using Tinkercad.  They are 61mm for 60mm bases but after painting and weathering I need to make the next lot 62mm.

tinkercad
I am such a talented designer


I glued the rings onto plasticard then filled with some caulk.  I then flocked it up and the results are rather splendid.  I can even place a team weapon where the trees sit.


Plasticard cut out with a scribing tool


Looking the business

ebay wargame trees
Looks great with the Ebay Trees added

Sub out a tree for a German PAK 36


Friday, 27 October 2017

Designing and 3D Printing 15mm Fantasy Bases and Movement Trays

I have been loving Tinkercad and I needed a solution for my 15mm Fantasy basing woes.  I have designed a prototype that I think I am going to stick with.  I haven't glued the figures to their bases yet but will most likely go ahead with this prototype and it will be the standard for my 15mm basing.

I predominantly want to do 15mm Fantasy for dungeon crawling however I do like the idea of using them in other systems and they look awesome in Rank and File.

3D Fantasy Movement Tray
The prototype in its full glory! Pretty stocked with this!

First off I designed a base in Tinkercad that would accommodate a Ral Partha figure and a 1mm magnet.  The Ral Partha troops are around 10mm in diameter with their included base.  The figure will "sink" into the base with room for a 1mm magnet underneath it. The dimensions of the base are 12mm x 12mm x 2mm.  The 10mm hole for the figure is 1mm deep and the hole for the 2mm x 1mm magnet is 1mm deep.

15mm fantasy base
Prototype base for Ral Partha 15mm Fantasy figures

I then printed it off and everything came out nicely.  My printer does need a little fine tuning.
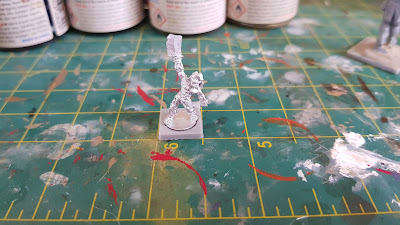


I used a zombie to test it, worked out very nicely

I then needed to design a movement tray.  I am completely unfamiliar with massed battles and movement tray sizes for 15mm. I wanted to start off with a 4 x 2 tray and came up with the following.

The prototype movement tray

The dimensions for the tray are: 51.5mm x 25.9mm x 3mm.  This will allow the figure on its base to fit nice and flush and allow a 2mm x 1mm magnet to drop int.  The walls dividing the figures are 0.3mm in width!

I did a test print which came out well except I need to tune my printer slightly.  

3D printed fantasy movement tray
Needed a little clean up but design checks out!
I made the holes for the magnets slightly bigger than 2mm to allow a little extra room however I found I don't need it as I tweaked with my slicer settings.

The magnets were slightly loose but this will be an easy fix in Tinkercad.  They were glued in.


I was pretty impressed how this turned out.  I decided to put my skeletons into the bases and everything checked out!

They fit nicely and provide great stability for my 3D printed dungeon

Rank and file looks awesome


12mm x 12mm base size feels just about right


What's next?

Once I get some feedback from the internet I will adjust the design and go from there.  I am already thinking the 12mm base is almost perfect in size, as it provides great stability and isn't too big.  Any smaller probably wouldn't work.  I need to tighten up the holes for the magnets as my slicer and 3D printer are super accurate!  I am not limited to 4 x 2, any combination is possible.  I just need to improve my skills in Tinkercad to churn out the movement trays.

Once I am happy with everything these will be released on thingiverse.


Wednesday, 25 October 2017

3D Printing Napoleonic Movement Trays and Bases Part 2

So I have been late to the party and discovered Tinkercad.  Loving it so far.  I have some big plans and will end up sharing my designs.  Just still getting my head around a few things.

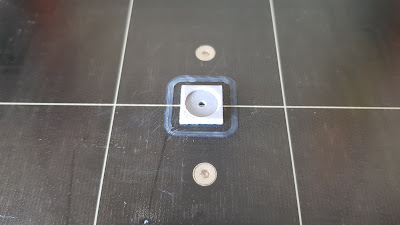
So I posted an article here on how I made my bases for my Napoleonics.  Well now I have designed a custom base I can proudly call my own that is 20mm x 20mm x 2mm.  It has a hole in the exact centre to allow a 5mm x 2mm rare earth magnet to perfectly fit.  I made the hole for it 5.3mm in diameter for a tight fit.

This saves the drill and a lot of mess... oh an unnecessary plastic wastage!

This is only the beginning.

Tinkercad design wargame base
Proud of my first design using Tinkercad. 20x20x2 base with a 5.3mm hole

3d printed wargame base
Duplicated it in the slicer as I needed to bases

wargame base magnet
A perfect snug fit, I only add Glue when placing the Soldiers on

Boom!